Disassembling and Understanding the M242 Bushmaster Bolt Assembly
The M242 Bushmaster is a widely used 25mm chain gun, known for its reliability and effectiveness in various military applications. Understanding the intricacies of its components, particularly the bolt assembly from a M242 Bushmaster disassembled, is crucial for maintenance, repair, and overall operational readiness. This article provides a detailed overview of the bolt assembly from a M242 Bushmaster disassembled, covering its function, disassembly process, key components, and reassembly considerations.
Why Understanding the Bolt Assembly Matters
The bolt assembly from a M242 Bushmaster disassembled is a critical part of the weapon system. It’s responsible for chambering rounds, firing, and extracting spent casings. A malfunctioning bolt assembly can lead to weapon stoppages, reduced accuracy, or even catastrophic failures. Therefore, a thorough understanding of its components and how they interact is essential for:
- Maintenance Personnel: Technicians need to be able to disassemble, inspect, and repair the bolt assembly from a M242 Bushmaster disassembled effectively.
- Armorers: Accurate knowledge facilitates proper maintenance schedules and troubleshooting.
- Operators: While operators may not perform detailed repairs, understanding the basic function of the bolt assembly from a M242 Bushmaster disassembled helps in identifying potential problems and performing basic field maintenance.
Overview of the M242 Bushmaster
Before diving into the specifics of the bolt assembly from a M242 Bushmaster disassembled, it’s helpful to understand the context of the weapon system itself. The M242 Bushmaster is a chain-driven autocannon that fires 25mm ammunition. Its key features include:
- Chain Drive: An external electric motor drives the firing cycle, offering high reliability and consistent performance.
- Versatility: The M242 can fire a variety of ammunition types, including high-explosive, armor-piercing, and training rounds.
- Wide Deployment: The weapon is used on a variety of platforms, including infantry fighting vehicles (e.g., the M2 Bradley), naval vessels, and air defense systems.
Disassembly of the Bolt Assembly
Safety First: Before beginning any disassembly, ensure the weapon is clear and safe. Follow all applicable safety procedures and refer to the official technical manual for the M242 Bushmaster.
The disassembly process of the bolt assembly from a M242 Bushmaster disassembled typically involves the following steps:
- Removal from the Weapon: The bolt assembly must first be removed from the weapon. This usually involves disengaging locking mechanisms and carefully sliding the assembly out.
- Initial Inspection: Before further disassembly, visually inspect the bolt assembly from a M242 Bushmaster disassembled for any obvious damage, wear, or corrosion.
- Pin Removal: Several pins hold the various components of the bolt assembly together. These pins must be carefully driven out using appropriate tools. Note the orientation of each pin for correct reassembly.
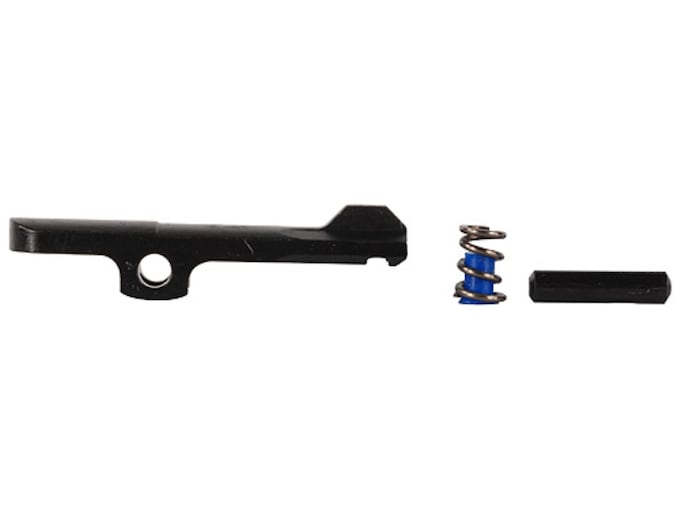
- Extractor Removal: The extractor is responsible for pulling spent casings from the chamber. It is usually held in place by a pin and spring. Remove these components carefully.
- Ejector Removal: The ejector helps to expel the spent casing from the weapon. It is also typically held in place by a pin and spring.
- Firing Pin Removal: The firing pin strikes the primer of the cartridge to initiate firing. It should be removed with caution, as it may be under spring tension.
- Disassembly of Breech Block: The breech block houses the firing pin and other critical components. It may require further disassembly to access all internal parts.
Key Components of the Bolt Assembly
Understanding the function of each component within the bolt assembly from a M242 Bushmaster disassembled is crucial for effective maintenance and repair. The key components include:
- Bolt Body: The main housing of the bolt assembly, providing structural support and containing other components.
- Extractor: Responsible for gripping and extracting spent casings from the chamber.
- Ejector: Responsible for ejecting the spent casing from the weapon.
- Firing Pin: Strikes the primer of the cartridge to initiate firing.
- Firing Pin Spring: Provides the force needed to drive the firing pin forward.
- Breech Block: Houses the firing pin and other internal components, and locks the bolt in place during firing.
- Locking Mechanism: Secures the bolt in the locked position during firing, ensuring a tight seal and preventing premature opening.
- Cam Pin: Interacts with the operating mechanism to control the bolt’s movement.
Inspection and Maintenance
Regular inspection and maintenance are vital for ensuring the reliability and longevity of the bolt assembly from a M242 Bushmaster disassembled. Key inspection points include:
- Cracks and Damage: Check for any cracks, chips, or other damage to the bolt body, breech block, and other components.
- Wear: Inspect the extractor and ejector for wear on their gripping surfaces. Replace worn parts as needed.
- Corrosion: Look for signs of corrosion on any of the components. Clean and lubricate affected areas.
- Spring Tension: Check the firing pin spring and other springs for proper tension. Replace weak or broken springs.
- Pin Fit: Ensure that all pins fit snugly and are not loose or damaged.
Maintenance procedures typically involve:
- Cleaning: Thoroughly clean all components to remove dirt, carbon buildup, and other contaminants.
- Lubrication: Apply appropriate lubricant to all moving parts to reduce friction and prevent wear.
- Replacement of Worn Parts: Replace any worn or damaged parts to maintain optimal performance.
Reassembly of the Bolt Assembly
Reassembly of the bolt assembly from a M242 Bushmaster disassembled is essentially the reverse of the disassembly process. It is crucial to follow the technical manual closely and ensure that all components are correctly positioned and secured. Key considerations during reassembly include:
- Correct Pin Orientation: Ensure that all pins are installed in the correct orientation. Some pins may have a specific direction of insertion.
- Spring Tension: Be mindful of spring tension when installing the firing pin and other components.
- Proper Lubrication: Apply lubricant to all moving parts during reassembly.
- Torque Specifications: If applicable, tighten any screws or bolts to the specified torque values.
- Functional Testing: After reassembly, perform functional tests to ensure that the bolt assembly operates correctly. This may involve manually cycling the bolt and checking for proper extraction and ejection.
Troubleshooting Common Issues
Even with proper maintenance, the bolt assembly from a M242 Bushmaster disassembled may experience occasional issues. Some common problems and their potential causes include:
- Failure to Extract: This could be caused by a worn extractor, a dirty chamber, or a weak extractor spring.
- Failure to Eject: This could be caused by a worn ejector, a dirty ejector port, or a weak ejector spring.
- Failure to Fire: This could be caused by a broken firing pin, a weak firing pin spring, or a problem with the ammunition.
- Light Strikes: This could be caused by a worn firing pin, a weak firing pin spring, or excessive headspace.
When troubleshooting, always refer to the official technical manual for the M242 Bushmaster for detailed diagnostic procedures and repair instructions. [See also: M242 Bushmaster Maintenance Schedule]
The Importance of Proper Training
Proper training is essential for personnel who are responsible for maintaining and repairing the bolt assembly from a M242 Bushmaster disassembled. Training should cover:
- Disassembly and Reassembly Procedures: Hands-on training in the correct disassembly and reassembly techniques.
- Inspection Criteria: Instruction on how to identify worn or damaged parts.
- Troubleshooting Techniques: Guidance on how to diagnose and resolve common problems.
- Safety Procedures: Emphasis on the importance of following all applicable safety procedures.
Conclusion
The bolt assembly from a M242 Bushmaster disassembled is a complex and critical component of the weapon system. A thorough understanding of its function, disassembly process, key components, and maintenance requirements is essential for ensuring its reliability and effectiveness. By following the procedures outlined in this article and referring to the official technical manual, maintenance personnel can effectively maintain and repair the bolt assembly from a M242 Bushmaster disassembled, contributing to the overall operational readiness of the weapon system. Regular maintenance of the bolt assembly from a M242 Bushmaster disassembled will save time and resources in the long run. The bolt assembly from a M242 Bushmaster disassembled is a key element to keeping the weapon system functioning properly. The bolt assembly from a M242 Bushmaster disassembled requires expert knowledge. The intricacies of the bolt assembly from a M242 Bushmaster disassembled are important to understand for proper function. The bolt assembly from a M242 Bushmaster disassembled is not to be taken lightly and requires a trained professional. The bolt assembly from a M242 Bushmaster disassembled must be handled with care. The bolt assembly from a M242 Bushmaster disassembled is a delicate piece of machinery. The bolt assembly from a M242 Bushmaster disassembled is a vital part of the M242 system. The bolt assembly from a M242 Bushmaster disassembled, when properly maintained, can last a long time. Understanding the bolt assembly from a M242 Bushmaster disassembled contributes to overall knowledge of the M242. Familiarity with the bolt assembly from a M242 Bushmaster disassembled is crucial for those working with the weapon.
