Easy Henna Tattoos for Beginners: A Step-by-Step Guide
Henna tattoos, also known as mehndi, are a beautiful and temporary way to adorn the skin with intricate designs. For beginners, the prospect of creating these designs can seem daunting, but with the right guidance and a little practice, anyone can create stunning easy henna tattoos. This article will provide a comprehensive step-by-step guide to creating easy henna tattoos, offering tips and tricks to help you achieve professional-looking results at home.
Understanding Henna
Before diving into the process, it’s crucial to understand what henna is and how it works. Henna is a natural dye derived from the henna plant (Lawsonia inermis). The leaves are dried, crushed, and then mixed into a paste. This paste is applied to the skin, staining it a reddish-brown color. The color darkens over 24-48 hours as the henna oxidizes.
Important Note: Always use natural henna. Black henna, which contains a chemical dye called paraphenylenediamine (PPD), can cause severe allergic reactions and permanent scarring. Stick to natural henna to ensure your safety.
Materials You’ll Need for Easy Henna Tattoos
To get started with easy henna tattoos, you’ll need the following materials:
- Henna Powder: Opt for finely sifted henna powder for a smooth paste.
- Essential Oils: Lavender, tea tree, or cajeput oil enhance the stain and make the henna paste more pliable.
- Lemon Juice or Strong Tea: Used to mix the henna powder into a paste.
- Sugar: Adds moisture and helps the henna adhere to the skin.
- Applicator Bottles or Cones: These are used to apply the henna paste. You can purchase pre-made cones or make your own.
- Stencils (Optional): Stencils are a great tool for beginners who want to create precise designs.
- Cotton Balls or Tissues: For wiping away mistakes.
- Sealant: A mixture of lemon juice and sugar to keep the henna moist.
Making Your Own Henna Paste
While you can purchase pre-made henna cones, making your own paste allows you to control the ingredients and consistency. Here’s how:
- Sift the Henna Powder: Use a fine-mesh sieve to remove any clumps and ensure a smooth paste.
- Mix the Ingredients: In a glass bowl, combine the sifted henna powder with lemon juice or strong tea. Add sugar and essential oil. Start with small amounts and gradually add more liquid until you achieve a toothpaste-like consistency.
- Let it Rest: Cover the bowl with plastic wrap and let the paste rest for 24 hours in a warm place. This allows the dye to release.
- Test the Consistency: After 24 hours, check the consistency of the paste. It should be smooth and easily flowable. If it’s too thick, add a little more liquid. If it’s too thin, add more henna powder.
- Fill the Applicator: Transfer the henna paste to your applicator bottle or cone. Ensure there are no air bubbles that could disrupt the flow.
Simple Designs for Easy Henna Tattoos
When starting, it’s best to focus on simple designs. Here are a few ideas for easy henna tattoos:
Dots and Lines
Dots and lines are the building blocks of many henna designs. Practice creating straight lines, curved lines, and evenly spaced dots. These elements can be combined to create various patterns.
Floral Motifs
Simple floral motifs are another great option for beginners. Start with a central dot and then add petals around it. You can also create vines with leaves using simple lines and dots.
Geometric Patterns
Geometric patterns are easy to create and can be very visually appealing. Try creating simple triangles, squares, or diamonds. Repeat these shapes to create a more intricate design.
Using Stencils
Stencils are an excellent tool for beginners. Simply apply the stencil to your skin and fill in the design with henna paste. Remove the stencil carefully and allow the henna to dry.
Step-by-Step Guide to Applying Easy Henna Tattoos
Now that you have your henna paste and design ideas, it’s time to apply your easy henna tattoos:
- Prepare the Skin: Clean the area where you’ll be applying the henna with soap and water. Exfoliate gently to remove any dead skin cells. This will help the henna stain better.
- Apply the Henna: Hold the applicator bottle or cone like a pen and gently squeeze out the henna paste. Follow your design or stencil, applying a thin, even layer of henna to the skin.
- Correct Mistakes: If you make a mistake, use a cotton ball or tissue to wipe away the henna paste immediately.
- Allow it to Dry: Let the henna paste dry completely. This can take anywhere from 30 minutes to an hour. The drier the paste, the darker the stain will be.
- Apply Sealant: Once the henna paste is dry, apply a sealant made from lemon juice and sugar. This will keep the henna moist and help it adhere to the skin longer. Apply the sealant every 15-20 minutes.
- Keep it Moist: The longer the henna paste stays in contact with the skin, the darker the stain will be. Try to keep the henna moist for as long as possible. You can wrap the area with plastic wrap or medical tape to help retain moisture.
- Remove the Paste: After at least two hours (ideally 6-8 hours), gently scrape off the dried henna paste. Avoid washing the area with water for the first 12-24 hours.
- Apply Oil: After removing the paste, apply a natural oil like coconut oil or olive oil to the skin. This will help moisturize the skin and enhance the stain.
Tips for Darker Henna Stains
Achieving a dark henna stain requires attention to detail. Here are some tips to help you get the best results:
- Use High-Quality Henna: The quality of the henna powder is crucial. Opt for finely sifted, fresh henna powder.
- Proper Mixing: Ensure the henna paste has the right consistency and is properly mixed with essential oils and lemon juice.
- Skin Preparation: Exfoliate and clean the skin thoroughly before applying the henna.
- Keep it Moist: Apply a sealant and keep the henna paste moist for as long as possible.
- Heat: Apply gentle heat to the area after applying the henna. You can use a hairdryer on a low setting or sit in a warm room.
- Avoid Water: Avoid washing the area with water for the first 12-24 hours after removing the paste.
- Post-Care: Apply natural oil to the skin regularly to keep it moisturized.
Troubleshooting Common Issues
Even with careful preparation, you may encounter some issues. Here are some common problems and how to address them:
- Faint Stain: This could be due to low-quality henna, improper mixing, or insufficient contact time. Ensure you’re using high-quality henna, mixing it properly, and keeping it on the skin for at least two hours.
- Uneven Stain: This could be due to uneven application or inconsistent skin preparation. Ensure you’re applying the henna paste evenly and exfoliating the skin thoroughly.
- Allergic Reaction: If you experience itching, redness, or swelling, you may be allergic to the ingredients in the henna paste. Discontinue use immediately and seek medical attention. Ensure you are using natural henna and not black henna.
- Paste Not Sticking: This can happen if the paste is too dry or if the skin is too oily. Make sure your paste has the right consistency and clean the skin thoroughly before application.
Advanced Techniques for Easy Henna Tattoos
Once you’ve mastered the basics, you can explore more advanced techniques to create more intricate and detailed designs. These include:
Shading
Shading involves varying the pressure on the applicator to create different shades of color. This can add depth and dimension to your designs.
Layering
Layering involves applying multiple layers of henna paste to create a more complex design. This can be used to add texture and detail.
Negative Space
Negative space involves leaving certain areas of the design uncolored. This can create a visually striking effect.
Inspiration for Easy Henna Tattoos
Looking for inspiration? Here are some ideas to get you started:
- Nature-Inspired Designs: Flowers, leaves, and vines are always a popular choice.
- Tribal Patterns: Geometric patterns inspired by tribal art can be very striking.
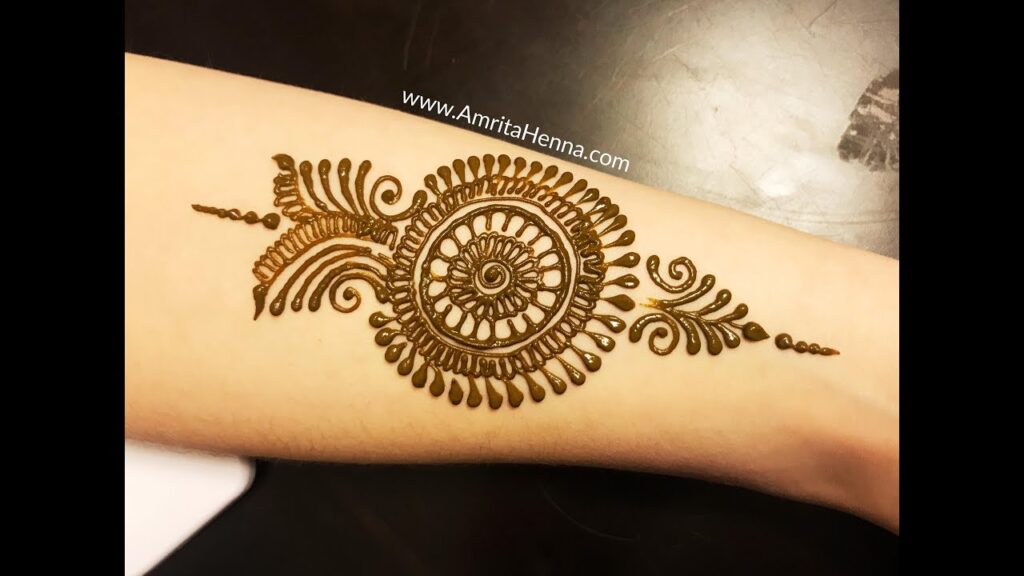
- Mandala Designs: Mandala designs are intricate and visually appealing.
- Personalized Designs: Incorporate your initials, favorite symbols, or meaningful quotes into your designs.
Creating easy henna tattoos is a fun and rewarding experience. With practice and patience, you can create beautiful and intricate designs that you’ll be proud to show off. Remember to always use natural henna, prepare your skin properly, and follow the tips outlined in this guide to achieve the best results. Happy henna-ing!
For more design ideas and inspiration, [See also: Henna Tattoo Design Gallery]. To learn about the history of henna, [See also: The Cultural Significance of Henna]. And for information on henna aftercare, [See also: Henna Tattoo Aftercare Tips].
