Mastering Landscape Photography with ND Filters: A Comprehensive Guide
Landscape photography is an art form that allows us to capture the beauty and grandeur of the natural world. One of the most crucial tools in a landscape photographer’s arsenal is the Neutral Density (ND) filter. Understanding how to effectively use ND filters in landscape photography can dramatically improve your images, allowing you to achieve effects that would otherwise be impossible. This comprehensive guide will delve into the nuances of ND filters, their purpose, types, and how to use them to elevate your landscape photography.
Understanding Neutral Density Filters
A Neutral Density (ND) filter is a filter that reduces the amount of light entering the camera lens without affecting the color or contrast of the scene. They are essentially sunglasses for your camera. The primary purpose of using ND filters in landscape photography is to allow for longer exposure times or wider apertures, even in bright conditions.
Why Use ND Filters?
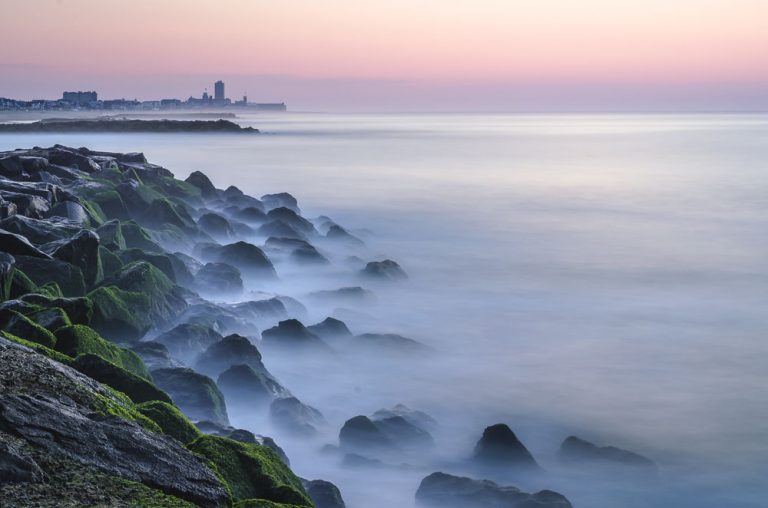
- Longer Exposure Times: ND filters enable you to use slower shutter speeds to blur motion, such as moving water or clouds, creating a sense of dynamism and ethereal beauty in your landscape photos.
- Wider Apertures: In bright light, it can be challenging to shoot with a wide aperture (e.g., f/2.8) to achieve a shallow depth of field. ND filters allow you to use wider apertures without overexposing your image.
- Reduced Diffraction: Shooting at very small apertures (e.g., f/16 or f/22) can cause diffraction, which softens your image. ND filters allow you to use a more optimal aperture (e.g., f/8 or f/11) while maintaining the desired exposure.
Types of ND Filters
ND filters come in various types, each with its own advantages and disadvantages. Here’s a breakdown of the most common types:
Solid ND Filters
Solid ND filters provide a uniform reduction of light across the entire frame. They are available in different strengths, typically measured in stops. For example, an ND2 filter reduces light by 1 stop, an ND4 filter reduces light by 2 stops, and an ND8 filter reduces light by 3 stops. These are the most basic and widely used type of ND filter.
Graduated ND Filters (GND)
Graduated ND filters (GNDs) are half clear and half neutral density, with a gradual transition between the two. They are primarily used to balance the exposure between a bright sky and a darker foreground. GNDs are essential for landscape photography, particularly when shooting scenes with a wide dynamic range. There are two main types of GNDs: soft-edge and hard-edge.
- Soft-Edge GND: The transition between the clear and ND portion is gradual, making it suitable for scenes with irregular horizons, such as mountains or trees.
- Hard-Edge GND: The transition is abrupt, making it ideal for scenes with a distinct horizon, such as the ocean.
Variable ND Filters
Variable ND filters (also known as adjustable ND filters) allow you to dial in the desired amount of light reduction by rotating the filter. They typically cover a range of stops, such as 2-8 stops or 5-9 stops. Variable ND filters are convenient because you don’t have to carry multiple filters, but they can sometimes introduce color casts or vignetting, especially at the higher end of their range. It’s important to invest in a high-quality variable ND filter to minimize these issues. [See also: Choosing the Right Camera Lens for Landscape Photography]
Choosing the Right ND Filter Strength
Selecting the appropriate ND filter strength depends on the lighting conditions and the desired effect. Here are some guidelines:
- Low-Light Conditions (e.g., Sunset, Sunrise): A 1-3 stop ND filter (ND2 to ND8) may be sufficient to slightly blur motion or use a wider aperture.
- Bright Daylight: A 6-10 stop ND filter (ND64 to ND1000) is often necessary to achieve long exposure times (e.g., several seconds or minutes) to create smooth, milky water or dramatic cloud movement.
- Extremely Bright Conditions (e.g., Snow Scenes, Beaches): A 10+ stop ND filter (ND1000 or higher) might be required to achieve the desired effect without overexposing the image.
Experimentation is key to finding the right ND filter strength for your specific needs. It’s always a good idea to carry a range of filters so you can adapt to different situations.
How to Use ND Filters in Landscape Photography
Using ND filters in landscape photography effectively requires a systematic approach. Here’s a step-by-step guide:
- Compose Your Shot: Before attaching the ND filter, carefully compose your shot. Consider the foreground, background, and overall composition.
- Set Your Camera to Aperture Priority Mode (Av or A): This allows you to control the aperture while the camera automatically adjusts the shutter speed.
- Determine Your Base Exposure: Without the ND filter, take a test shot to determine the correct exposure settings. Note the aperture, shutter speed, and ISO.
- Attach the ND Filter: Carefully attach the ND filter to your lens. Make sure it’s securely mounted to prevent light leaks.
- Calculate the New Shutter Speed: Use the ND filter factor to calculate the new shutter speed. For example, if you’re using an ND1000 (10-stop) filter, multiply your base shutter speed by 1024 (2^10). If your base shutter speed was 1/60th of a second, your new shutter speed would be approximately 17 seconds. Many smartphone apps can help you calculate the new shutter speed.
- Adjust ISO and Aperture (If Necessary): If the calculated shutter speed is too long or too short, you can adjust the ISO or aperture to fine-tune the exposure. However, be mindful of the potential impact on image quality (e.g., higher ISO can introduce noise, smaller apertures can cause diffraction).
- Use a Remote Shutter Release: To avoid camera shake during long exposures, use a remote shutter release or the camera’s self-timer.
- Take the Shot and Review: Take the shot and review the image on your camera’s LCD screen. Check for proper exposure, sharpness, and any unwanted artifacts (e.g., color casts, vignetting). Adjust the settings as needed and repeat the process.
Tips for Using ND Filters
- Invest in High-Quality Filters: Cheap ND filters can degrade image quality by introducing color casts, reducing sharpness, or causing vignetting. Invest in reputable brands known for their quality.
- Clean Your Filters Regularly: Dust, fingerprints, and smudges can affect image quality. Clean your ND filters with a microfiber cloth and lens cleaning solution before each shoot.
- Shoot in RAW Format: Shooting in RAW format gives you more flexibility in post-processing to correct any minor exposure or color issues.
- Use a Histogram: The histogram is a graphical representation of the tonal distribution in your image. Use it to ensure that your image is properly exposed and that you’re not clipping highlights or shadows.
- Practice and Experiment: The best way to master the use of ND filters in landscape photography is to practice and experiment. Try different settings and techniques to see what works best for you.
Common Mistakes to Avoid
- Overexposing or Underexposing Your Images: It’s crucial to accurately calculate the new shutter speed when using ND filters. Use your camera’s histogram to ensure proper exposure.
- Ignoring Color Casts: Some ND filters can introduce color casts, particularly variable ND filters. Correct these color casts in post-processing using software like Adobe Lightroom or Capture One.
- Forgetting to Clean Your Filters: Dirty ND filters can significantly degrade image quality. Always clean your filters before each shoot.
- Using the Wrong Type of GND Filter: Using a hard-edge GND filter in a scene with an irregular horizon can create an unnatural-looking transition. Choose the appropriate type of GND filter for the scene.
Post-Processing ND Filter Landscape Photos
Post-processing is an essential part of the ND filter landscape photography workflow. Here are some common adjustments you might make:
- Exposure Correction: Fine-tune the exposure to achieve the desired brightness and contrast.
- Color Correction: Correct any color casts introduced by the ND filter.
- White Balance Adjustment: Adjust the white balance to ensure accurate colors.
- Contrast Enhancement: Increase the contrast to make the image more visually appealing.
- Sharpening: Sharpen the image to enhance details.
- Noise Reduction: Reduce noise, especially in long exposure images.
Conclusion
ND filters are powerful tools that can significantly enhance your landscape photography. By understanding the different types of ND filters, how to choose the right strength, and how to use them effectively, you can create stunning images with blurred motion, balanced exposures, and improved overall image quality. Mastering the use of ND filters in landscape photography takes practice and experimentation, but the results are well worth the effort. So, grab your camera, ND filters, and head out to capture the beauty of the natural world!
